Tokenization
Tokenization allows you to store payment data for later use. This can be useful for recurring and/or one-click payment scenarios.
This guide will describe how you can store account details using COPYandPAY and how you can subsequently use the stored account details.
Storing the payment data
COPYandPAY provides two options for storing the payment data:
- Store the data during a payment: When a shopper is checking out for the first time, he has to fill in his complete payment- and address data. Use this option to automatically store his data during the payment for reuse in later transactions.
- Store the data as stand-alone: If your site provides shoppers with an administrative area where they can register their payment details independent of a checkout-process, this option is for you.
Store the data during a payment
You have two options for achieving this:
- Merchant-determined tokenization
- Shopper-determined tokenization.
Merchant-determined tokenization
During the checkout process you can store the data by adding an additional parameter to the normal prepare checkout request as described in step 1 of the COPYandPAY checkout:
createRegistration=true
standingInstruction.source=CIT
standingInstruction.mode=INITIAL
After the account holder has filled in their account information and are redirected back to your shopperResultUrl, you can retrieve the response information as usual (step 3). This time, however, the response will include a registrationId (token) and useful card information that you can store for future 'one-click payment' requests.
Shopper-determined tokenization
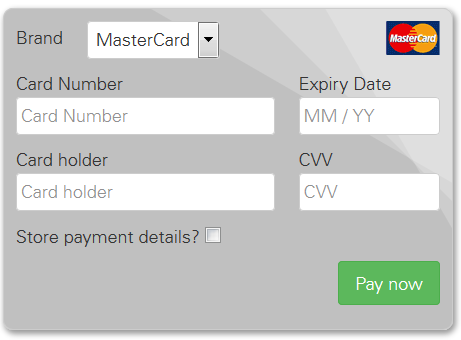
When the payment form is displayed as described in step 2 of the COPYandPAY checkout, you can extend the form to display an option to your customer that allows him store his account data.
This can be achieved very easily by using the COPYandPAY API. You can see an example implementation of this in the "store payment details" use case that is part of the Advanced Options tutorial.
After the account holder has filled in his account information and was redirected to the shopperResultUrl, you can retrieve the response information as usual (step 3). This time, however, the response will include a registrationId (token) and useful card information that you can store for future 'one-click payment' requests.
Store the data as stand-alone
With COPYandPAY it is also possible to create a just registration separate from any later payment.
A registration-only transaction with COPYandPAY is basically using the same workflow and parameters as a payment.
You only have to change two parameters in step1:
createRegistration=truehas to be sent.paymentTypeshould not be sent.
Now COPYandPAY automatically adapts the workflow for handling a registration:
- In step2 COPYandPAY will render the payment form as usual, but send the form to
https://eu-test.oppwa.com/v1/checkouts/{checkoutId}/registration - In step3 you'll get back a resourcePath pointing to you to query for a registration's result:
resourcePath=/v1/checkouts/{checkoutId}/registration
IMPORTANT: The baseUrl (that is prepended to the resourcePath) must end in a "/", e.g. "https://eu-test.oppwa.com/".
Using the payment data
Use Case 1: Recurring Payment
Based on the stored account details, recurring payments become very simple to achieve.
All you need to do is to add the parameter standingInstruction to your request to the /checkouts endpoint (see step1):
- For the initial payment request you should send the
standingInstruction.modewith valueINITIAL,standingInstruction.typewith valueUNSCHEDULEDandstandingInstruction.sourcewith valueCIT. - For any subsequent payment you should send the
standingInstruction.modewith valueREPEATED,standingInstruction.typewith valueUNSCHEDULED,standingInstruction.sourcewith valueMITandstandingInstruction.initialTransactionIdwith a value as ID received in the response of the initial CIT transaction.
The Recurring Payment tutorial explains this scenario in more detail. Follow the section Card On File for possible StandingInstruction parameters.
Use Case 2: One-Click Payment
After storing a customer's account details, it is possible to offer a 'one-click payment' checkout, to simplify subsequent purchases.
Basically you're using the token you've received in the original payment's response in the field registrationId to reference and even prefill a customer's payment form.

The Server-to-Server One-click Payment tutorial
Or
COPYandPAY One-click Checkout tutorial explains this scenario in more detail.